| Phân Tích Thống Kê Mô Tả Với Python (Descriptive Statistics)

Được viết bởi thanhdt vào ngày 09/12/2025 lúc 19:02 | 294 lượt xem

Phân Tích Thống Kê Mô Tả Với Python (Descriptive Statistics)

https://indhumathychelliah.com/wp-content/uploads/2020/10/621bc-1wcoddky1o_vshjxshurgog.png?utm_source=chatgpt.com

Phân tích thống kê mô tả giúp bạn hiểu:

  • Dữ liệu phân bố như thế nào?
  • Giá trị trung bình – trung vị – độ lệch chuẩn
  • Biến động dữ liệu ra sao?
  • Dữ liệu có bị lệch, có nhiều outliers không?
  • Nhóm nào, sản phẩm nào, tháng nào có hiệu suất cao nhất?

Đây là nền tảng để tiếp tục phân tích sâu hơn và xây dựng mô hình dự báo.


1. Tạo dữ liệu mẫu

import pandas as pd

df = pd.DataFrame({
    "revenue": [120, 150, 180, 200, 130, 170, 160],
    "cost":     [30,  50,  40,  60,  35,  45,  55],
    "category": ["A","A","B","B","A","C","C"]
})

2. Xem thống kê nhanh với describe()

df.describe()

Kết quả gồm:

  • count
  • mean
  • std (độ lệch chuẩn)
  • min
  • 25%
  • 50%
  • 75%
  • max

Đây là bước “nhìn tổng quan” cực nhanh.


3. Các thống kê cơ bản (Mean, Median, Mode)

Trung bình

df["revenue"].mean()

Trung vị

df["revenue"].median()

Mode (giá trị xuất hiện nhiều nhất)

df["category"].mode()

4. Độ lệch chuẩn & Phương sai (Std, Variance)

https://upload.wikimedia.org/wikipedia/commons/thumb/8/8c/Standard_deviation_diagram.svg/1200px-Standard_deviation_diagram.svg.png?utm_source=chatgpt.com
https://media.geeksforgeeks.org/wp-content/uploads/20250416173023324897/Variance.webp?utm_source=chatgpt.com
https://i.sstatic.net/wlPvD.png?utm_source=chatgpt.com

Phương sai:

df["revenue"].var()

Độ lệch chuẩn:

df["revenue"].std()

Std cao → biến động lớn → rủi ro cao


5. Hệ số biến thiên (Coefficient of Variation)

Đo mức độ biến động tương đối.

cv = df["revenue"].std() / df["revenue"].mean()

6. Phân tích theo nhóm (Groupby)

Nhóm theo category:

df.groupby("category")["revenue"].mean()

Đếm số lượng:

df.groupby("category").size()

Nhiều chỉ số cùng lúc:

df.groupby("category").agg({
    "revenue": ["mean","sum","count"],
    "cost": ["mean","max"]
})

7. Phân phối dữ liệu (Distribution)

https://proclusacademy.com/images/011_distribution_summary.png?utm_source=chatgpt.com
https://analystix.com/wp-content/uploads/2017/07/Food-and-Staples-Revenue-Growth.jpg?utm_source=chatgpt.com
https://files.realpython.com/media/commute_times.621e5b1ce062.png?utm_source=chatgpt.com

Histogram:

import matplotlib.pyplot as plt

df["revenue"].plot(kind="hist", bins=10)
plt.show()

Giúp xem:

  • Dữ liệu có chuẩn không?
  • Có bị lệch phải / lệch trái không?
  • Có nhiều outliers không?

8. Boxplot – Phát hiện outliers

https://media.geeksforgeeks.org/wp-content/uploads/20200427003346/plot29.png?utm_source=chatgpt.com
https://miro.medium.com/1%2A0MPDTLn8KoLApoFvI0P2vQ.png?utm_source=chatgpt.com
https://datavizproject.com/wp-content/uploads/types/Boxplot.png?utm_source=chatgpt.com
df.boxplot(column="revenue")
plt.show()

Ý nghĩa:

  • Đường giữa = median
  • Hộp = 50% dữ liệu
  • Điểm ngoài = outliers

9. Phân tích tương quan (Correlation)

Tương quan giữa revenue và cost?

df.corr()

Vẽ heatmap:

import seaborn as sns
sns.heatmap(df.corr(), annot=True)

Ý nghĩa:

  • Gần 1 → tương quan mạnh cùng chiều
  • Gần -1 → tương quan mạnh ngược chiều
  • Gần 0 → không tương quan

10. Phân tích theo thời gian (Time Series)

Nếu có cột date:

df["date"] = pd.to_datetime(df["date"])
df.set_index("date")["revenue"].plot()

Phân tích:

  • Xu hướng (trend)
  • Mùa vụ (seasonality)
  • Biến động theo ngày/tuần/tháng

11. Pivot Table – siêu mạnh trong phân tích

https://pandas.pydata.org/docs/_images/reshaping_pivot.png?utm_source=chatgpt.com
https://gonzalo123.com/wp-content/uploads/2018/03/pivot_tables_8.png?utm_source=chatgpt.com
https://i.ytimg.com/vi/_vCeQOPlYsQ/hqdefault.jpg?utm_source=chatgpt.com
pd.pivot_table(
    df,
    values="revenue",
    index="category",
    aggfunc=["mean","sum","count"]
)

Pivot table giúp:

  • Gộp dữ liệu theo nhóm
  • Tính KPI
  • So sánh nhóm với nhau

12. Phân tích tổng hợp (Summary Report)

Ví dụ báo cáo nhanh:

report = {
    "total_revenue": df["revenue"].sum(),
    "avg_revenue": df["revenue"].mean(),
    "std_revenue": df["revenue"].std(),
    "max_revenue": df["revenue"].max(),
    "min_revenue": df["revenue"].min(),
    "top_category": df.groupby("category")["revenue"].sum().idxmax()
}
print(report)

13. Kết luận

Sau bài 4 bạn đã nắm:

  • Thống kê mô tả
  • Trung bình – trung vị – mode
  • Độ lệch chuẩn – phương sai
  • Phân nhóm (groupby)
  • Trực quan hóa phân phối
  • Phát hiện outliers
  • Phân tích tương quan
  • Pivot Table
  • Báo cáo tổng hợp

Đây là nền tảng của Data Analytics và Machine Learning.

Không có phân tích thống kê mô tả → Không hiểu dữ liệu → Không thể mô hình hóa.

| Làm Sạch & Xử Lý Dữ Liệu Với Python (Data Cleaning & Preprocessing)

Được viết bởi thanhdt vào ngày 09/12/2025 lúc 19:00 | 323 lượt xem

Làm Sạch & Xử Lý Dữ Liệu Với Python (Data Cleaning & Preprocessing)

https://www.nobledesktop.com/image/pythondatawrangling1.png?utm_source=chatgpt.com

Dữ liệu thực tế luôn bẩn: thiếu dữ liệu, giá trị sai, định dạng lộn xộn, trùng lặp, đơn vị không thống nhất…
Vì vậy, bước làm sạch dữ liệu (Data Cleaning) là quan trọng nhất trong phân tích dữ liệu.

80% thời gian của Data Analyst là dành cho việc xử lý dữ liệu!

Bài 3 giúp bạn:

  • Xử lý dữ liệu thiếu (missing values)
  • Loại bỏ trùng lặp
  • Chuẩn hóa kiểu dữ liệu
  • Loại bỏ outliers
  • Tạo cột mới
  • Cắt – ghép – gộp dữ liệu
  • Xử lý ngày tháng
  • Làm sạch text
  • Chuẩn hóa dữ liệu phục vụ thống kê

1. Kiểm tra dữ liệu thô

import pandas as pd

df = pd.read_csv("sales.csv")

df.info()
df.describe()
df.head()

Thông tin cần xem:

  • Kiểu dữ liệu (object, int, float, datetime)
  • Dữ liệu thiếu
  • Các giá trị bất thường
  • Cột chứa dấu cách/ ký tự sai

2. Xử lý dữ liệu thiếu (Missing Values)

https://miamioh.edu/centers-institutes/center-for-analytics-data-science/students/coding-tutorials/python/_images/dc11.png?utm_source=chatgpt.com
https://datascienceparichay.com/wp-content/uploads/2021/01/pandas-fillna-with-values-from-another-column.png?utm_source=chatgpt.com
https://datascienceplus.com/wp-content/uploads/2019/12/Screenshot-2019-12-07-at-1.32.21-AM.png?utm_source=chatgpt.com

Kiểm tra missing:

df.isna().sum()

Cách xử lý missing values

(1) Xóa dòng thiếu dữ liệu

df = df.dropna()

(2) Thay thế bằng giá trị trung bình / trung vị

df["revenue"] = df["revenue"].fillna(df["revenue"].mean())

(3) Thay bằng giá trị phổ biến nhất (mode)

df["category"] = df["category"].fillna(df["category"].mode()[0])

(4) Thay bằng giá trị tùy chọn

df["status"] = df["status"].fillna("unknown")

3. Xử lý trùng lặp (Duplicates)

https://journaldev.nyc3.cdn.digitaloceanspaces.com/2019/11/pandas-dataframe-drop-duplicate-rows.png?utm_source=chatgpt.com
https://www.kdnuggets.com/wp-content/uploads/rosidi_mastering_art_data_cleaning_python_6.jpg?utm_source=chatgpt.com
https://kunaltripathy.com/wp-content/uploads/2019/10/datacleaning.png?utm_source=chatgpt.com

Kiểm tra số bản ghi trùng:

df.duplicated().sum()

Xóa bản ghi trùng:

df = df.drop_duplicates()

Xóa trùng theo cột:

df = df.drop_duplicates(subset=["order_id"])

4. Chuẩn hóa kiểu dữ liệu (Data Types Cleaning)

Chuẩn hóa số:

df["price"] = pd.to_numeric(df["price"], errors="coerce")

Chuẩn hóa ngày tháng:

df["date"] = pd.to_datetime(df["date"], format="%Y-%m-%d")

Chuẩn hóa text:

df["name"] = df["name"].str.strip().str.lower()

5. Làm sạch dữ liệu văn bản (Text Cleaning)

https://media.geeksforgeeks.org/wp-content/uploads/20250924153111948541/text_processing.webp?utm_source=chatgpt.com
https://pbpython.com/images/text-clean-summary.png?utm_source=chatgpt.com
https://pluralsight.imgix.net/course-images/cleaning-string-data-python-v1.jpg?utm_source=chatgpt.com
df["product"] = (
    df["product"]
    .str.strip()
    .str.lower()
    .str.replace(r"[^a-zA-Z0-9 ]", "", regex=True)
)

Operations:

  • Loại bỏ khoảng trắng
  • Loại bỏ ký tự đặc biệt
  • Chuyển về lowercase
  • Thay ký tự sai

6. Xử lý Outliers (Giá trị ngoại lai)

Phương pháp dùng IQR (Interquartile Range):

Q1 = df["revenue"].quantile(0.25)
Q3 = df["revenue"].quantile(0.75)
IQR = Q3 - Q1

lower = Q1 - 1.5 * IQR
upper = Q3 + 1.5 * IQR

df_no_outliers = df[(df["revenue"] >= lower) & (df["revenue"] <= upper)]

7. Tạo cột mới (Feature Creation)

Ví dụ tạo lợi nhuận:

df["profit"] = df["revenue"] - df["cost"]

Tạo phần trăm tăng trưởng:

df["growth"] = df["revenue"].pct_change()

Tạo cột phân loại:

df["high_revenue"] = df["revenue"] > 10000000

8. Xử lý ngày tháng & thời gian

https://i.sstatic.net/O2FMo.png?utm_source=chatgpt.com
https://www.researchgate.net/publication/359967853/figure/fig1/AS%3A1145127242350596%401650031018069/The-process-of-time-series-data-preprocessing.jpg?utm_source=chatgpt.com
https://i.ytimg.com/vi/ywB9o5DWJ4E/maxresdefault.jpg?utm_source=chatgpt.com
df["date"] = pd.to_datetime(df["date"])

df["year"] = df["date"].dt.year
df["month"] = df["date"].dt.month
df["weekday"] = df["date"].dt.day_name()

Lọc theo tháng:

df_jan = df[df["date"].dt.month == 1]

9. Cắt – ghép dữ liệu (Split & Merge)

Merge bảng:

df_new = df_orders.merge(df_customers, on="customer_id", how="left")

Concatenate:

df_all = pd.concat([df1, df2])

Split cột:

df[["first", "last"]] = df["fullname"].str.split(" ", 1, expand=True)

10. Chuẩn hóa đơn vị (Unit Standardization)

Ví dụ cột “doanh thu” có 2 dạng:

  • “12M” (triệu)
  • “500K” (nghìn)
df["revenue_clean"] = (
    df["revenue"]
    .str.replace("M", "000000")
    .str.replace("K", "000")
)
df["revenue_clean"] = pd.to_numeric(df["revenue_clean"])

11. Chuẩn bị dữ liệu cho Machine Learning

Định chuẩn hóa (Standardization):

from sklearn.preprocessing import StandardScaler

scaler = StandardScaler()
df_scaled = scaler.fit_transform(df[["revenue", "cost"]])

One-hot encoding:

df = pd.get_dummies(df, columns=["category"])

12. Kết luận

Làm sạch dữ liệu là bước quan trọng nhất, chiếm nhiều thời gian nhất trong phân tích dữ liệu.

Sau bài 3 bạn đã biết:

  • Xử lý missing
  • Xóa trùng
  • Chuẩn hóa dữ liệu
  • Làm sạch text
  • Xử lý outliers
  • Tạo tính năng mới
  • Xử lý ngày tháng
  • Ghép bảng

Dữ liệu sạch → phân tích đúng → báo cáo chính xác → quyết định tốt.

| Thu Thập Dữ Liệu Với Python (CSV → Excel → SQL → API → Web Scraping)

Được viết bởi thanhdt vào ngày 09/12/2025 lúc 18:57 | 762 lượt xem

Thu Thập Dữ Liệu Với Python (CSV → Excel → SQL → API → Web Scraping)

https://files.realpython.com/media/ie-data-analysis-workflowv3.bfb835b95c5e.png?utm_source=chatgpt.com

Trong phân tích dữ liệu, thu thập dữ liệu (Data Ingestion) là bước đầu tiên – và quan trọng nhất.
Dữ liệu càng đầy đủ – sạch – chính xác → phân tích càng hiệu quả.

Python hỗ trợ tất cả nguồn dữ liệu phổ biến:

  • File: CSV, Excel
  • Cơ sở dữ liệu: MySQL, PostgreSQL
  • API: REST API, JSON API
  • Web Scraping: Tự động lấy dữ liệu từ website
  • Google Sheets
  • Dữ liệu thời gian thực (Real-time Streams)

Bài này sẽ hướng dẫn bạn cách lấy dữ liệu bằng Python theo từng nguồn.


1. Đọc dữ liệu từ CSV

CSV là định dạng phổ biến nhất.

import pandas as pd

df = pd.read_csv("sales.csv")
print(df.head())

Nếu file có dấu phẩy, dấu chấm phẩy:

df = pd.read_csv("sales.csv", sep=";")

Nếu file lớn → đọc nhanh với chunks:

for chunk in pd.read_csv("bigdata.csv", chunksize=100000):
    print(chunk)

2. Đọc dữ liệu từ Excel (.xlsx)

https://pbpython.com/images/excel_range_header_3.png?utm_source=chatgpt.com
https://support.microsoft.com/images/en-us/7bbe1c55-c4d2-49c2-a19e-1cd440859f6e?utm_source=chatgpt.com
df = pd.read_excel("report.xlsx")

Đọc file có nhiều sheet:

df = pd.read_excel("report.xlsx", sheet_name="Thang1")

Xuất Excel:

df.to_excel("output.xlsx", index=False)

3. Thu thập dữ liệu từ SQL (MySQL & PostgreSQL)

(1) Kết nối MySQL

import mysql.connector
import pandas as pd

conn = mysql.connector.connect(
    host="localhost",
    user="root",
    password="123456",
    database="sales"
)

df = pd.read_sql("SELECT * FROM orders", conn)
print(df.head())

(2) Kết nối PostgreSQL

import psycopg2
import pandas as pd

conn = psycopg2.connect(
    host="localhost",
    database="analytics",
    user="postgres",
    password="123456"
)

df = pd.read_sql("SELECT * FROM revenue", conn)

4. Lấy dữ liệu từ API (JSON)

https://www.dataquest.io/wp-content/uploads/2019/09/json.svg?utm_source=chatgpt.com
https://images.squarespace-cdn.com/content/v1/5644323de4b07810c0b6db7b/1497657996408-PT55M6ZS0BHJLEEQJ0A4/data.PNG?format=1000w&utm_source=chatgpt.com
https://www.sqlshack.com/wp-content/uploads/2021/03/a-sample-json-structure.png?utm_source=chatgpt.com

Dữ liệu API là nguồn cực kỳ quan trọng:

  • Dữ liệu tài chính
  • Dữ liệu thị trường
  • Dữ liệu bán hàng từ website
  • Dữ liệu CRM
  • Dữ liệu thời tiết, giao thông…

Ví dụ 1 – Lấy dữ liệu JSON từ một API công khai

import requests

url = "https://api.coindesk.com/v1/bpi/currentprice.json"
data = requests.get(url).json()

print(data)

Ví dụ 2 – API trả về bảng dữ liệu

import requests
import pandas as pd

url = "https://dummyjson.com/products"
data = requests.get(url).json()

df = pd.DataFrame(data["products"])
print(df.head())

Ví dụ 3 – API có tham số

url = "https://api.exchangerate.host/latest?base=USD"

res = requests.get(url).json()
print(res["rates"])

5. Web Scraping – Lấy dữ liệu từ website

https://files.realpython.com/media/Build-a-Web-Scraper-With-Requests-and-Beautiful-Soup_Watermarked.37918fb3906c.jpg?utm_source=chatgpt.com
https://media2.dev.to/dynamic/image/width%3D800%2Cheight%3D%2Cfit%3Dscale-down%2Cgravity%3Dauto%2Cformat%3Dauto/https%3A%2F%2Fdev-to-uploads.s3.amazonaws.com%2Fuploads%2Farticles%2Fmkibl7713h9tadiffwpb.png?utm_source=chatgpt.com
https://www.scraperapi.com/wp-content/uploads/img2-python-loop-thru-html-tabular-data.png?utm_source=chatgpt.com

Dùng khi:

  • Không có API
  • Website chỉ có bảng dữ liệu
  • Cần tự động hóa tải dữ liệu

Thư viện:

  • requests
  • BeautifulSoup

Ví dụ: Lấy bảng dữ liệu từ website

import requests
from bs4 import BeautifulSoup
import pandas as pd

url = "https://www.worldometers.info/world-population/population-by-country/"
html = requests.get(url).text

soup = BeautifulSoup(html, "html.parser")

table = soup.find("table")
rows = table.find_all("tr")

data = []
for row in rows:
    cols = [c.text.strip() for c in row.find_all("td")]
    if cols:
        data.append(cols)

df = pd.DataFrame(data)
print(df.head())

6. Thu thập dữ liệu từ Google Sheets

Cách 1: Public CSV

https://docs.google.com/spreadsheets/d/<sheetID>/export?format=csv
df = pd.read_csv("https://docs.google.com/…/export?format=csv")

Cách 2: API (yêu cầu credentials)

Sử dụng thư viện gspread.


7. Lấy dữ liệu thời gian thực (Realtime Data)

https://www.fullstackpython.com/img/visuals/websockets-flow.png?utm_source=chatgpt.com
https://datamachines.xyz/wp-content/uploads/2023/07/real_time_feature_pipeline_system.gif?utm_source=chatgpt.com
https://user-images.githubusercontent.com/25185589/134834412-a46921e6-329c-4b4e-9347-f59a53cd0186.png?utm_source=chatgpt.com

Ví dụ lấy dữ liệu giá Crypto qua WebSocket:

import websockets
import asyncio
import json

async def stream():
    url = "wss://stream.binance.com:9443/ws/btcusdt@trade"
    async with websockets.connect(url) as ws:
        while True:
            data = json.loads(await ws.recv())
            print(data)

asyncio.run(stream())

8. Tự động hóa quá trình thu thập dữ liệu (ETL Pipeline)

Cấu trúc pipeline:

Extract (lấy dữ liệu)
    ↓
Transform (xử lý – làm sạch – biến đổi)
    ↓
Load (lưu SQL / Excel / CSV / Dashboard)

Python hỗ trợ ETL với:

  • Pandas
  • Airflow
  • Prefect
  • Luigi
  • Cronjob (Linux)

9. Kết luận

Python giúp bạn thu thập dữ liệu từ mọi nguồn:

  • File (CSV, Excel)
  • SQL
  • API
  • Web Scraping
  • Google Sheets
  • Realtime streams

Một Data Analyst chuyên nghiệp phải thành thạo tối thiểu:

  • pandas
  • requests
  • sqlalchemy
  • BeautifulSoup
  • websockets

Dữ liệu tốt → phân tích tốt → kết luận chính xác.

| Python Trong Phân Tích Dữ Liệu: Tại Sao Python Là Ngôn Ngữ Quan Trọng Nhất Của Data Analyst?

Được viết bởi thanhdt vào ngày 09/12/2025 lúc 18:55 | 196 lượt xem

Python Trong Phân Tích Dữ Liệu: Tại Sao Python Là Ngôn Ngữ Quan Trọng Nhất Của Data Analyst?

https://blog.cloudxlab.com/wp-content/uploads/2017/12/numpypandasfeatureimage-3.png?utm_source=chatgpt.com

Python đã trở thành ngôn ngữ số 1 trong phân tích dữ liệu, vượt qua R, Excel, SQL và nhiều công cụ truyền thống.
Từ Data Analyst, Data Engineer, Machine Learning Engineer đến nhà nghiên cứu, tất cả đều dùng Python cho quy trình phân tích dữ liệu hiện đại.

Vì sao?
Bởi Python vừa đơn giản, mạnh mẽ, lại có một hệ sinh thái khổng lồ giúp xử lý mọi tác vụ liên quan đến dữ liệu.

Bài viết này giúp bạn hiểu:

  • Python là gì và vì sao phù hợp phân tích dữ liệu
  • Python dùng trong Data Analysis theo quy trình nào
  • Các thư viện quan trọng bạn sẽ sử dụng
  • Ứng dụng thực tế trong doanh nghiệp
  • Demo nhỏ: đọc – xử lý – phân tích dữ liệu bằng Python

1. Python là gì và vì sao phù hợp phân tích dữ liệu?

Python là ngôn ngữ:

  • Dễ học nhất trong nhóm ngôn ngữ lập trình
  • Đa dụng (web, AI, automation, phân tích dữ liệu…)
  • Có cộng đồng lớn nhất thế giới
  • Miễn phí 100%
  • Chạy được trên mọi hệ điều hành

Vì sao Python phù hợp phân tích dữ liệu?

✔ Cú pháp ngắn gọn, dễ đọc
✔ Hàng nghìn thư viện cho phân tích – thống kê – trực quan hóa
✔ Xử lý dữ liệu lớn nhanh hơn Excel
✔ Dễ tích hợp với SQL, API, Web, Machine Learning
✔ Dễ tự động hóa quy trình phân tích (ETL automation)


2. Quy trình phân tích dữ liệu bằng Python

https://files.realpython.com/media/ie-data-analysis-workflowv3.bfb835b95c5e.png?utm_source=chatgpt.com

Quy trình chuẩn:

1. Thu thập dữ liệu
2. Làm sạch dữ liệu
3. Chuyển đổi & xử lý
4. Phân tích thống kê
5. Trực quan hóa dữ liệu
6. Kết luận & báo cáo

Python hỗ trợ toàn bộ 6 bước, không cần phần mềm ngoài.


3. Các thư viện Python quan trọng nhất cho phân tích dữ liệu

(1) NumPy – Xử lý số liệu và ma trận

Trái tim của mọi phân tích dữ liệu.

  • Tính toán nhanh
  • Xử lý ma trận lớn
  • Tiền đề cho Pandas & Machine Learning

(2) Pandas – Xử lý dữ liệu dạng bảng (DataFrame)

https://media.geeksforgeeks.org/wp-content/uploads/finallpandas.png?utm_source=chatgpt.com
https://www.dasca.org/content/images/main/essential-data-manipulation-techniques-in-pandas.jpg?utm_source=chatgpt.com

Thư viện phổ biến nhất cho Data Analyst.

  • Đọc CSV, Excel, SQL
  • Lọc – nhóm – chuyển đổi dữ liệu
  • Ghép bảng
  • Xử lý thiếu dữ liệu

Ví dụ:

import pandas as pd

df = pd.read_csv("sales.csv")
print(df.head())

(3) Matplotlib / Seaborn – Vẽ biểu đồ

  • Line chart
  • Bar chart
  • Histogram
  • Heatmap
  • Boxplot
import matplotlib.pyplot as plt
df["revenue"].plot()
plt.show()

(4) Scikit-learn – Machine Learning cơ bản

  • Hồi quy
  • Phân loại
  • Clustering
  • Feature engineering

(5) Jupyter Notebook – Công cụ phân tích mạnh nhất

  • Viết code + mô tả + biểu đồ
  • Tương tác trực tiếp với dữ liệu

4. Python trong doanh nghiệp dùng để làm gì?

https://programmers.io/wp-content/uploads/2023/04/Understanding-Python-Programming.jpg?utm_source=chatgpt.com
https://data-flair.training/blogs/wp-content/uploads/sites/2/2020/11/Data-Science-Use-Cases-in-Analytics1.jpg?utm_source=chatgpt.com
https://www.business-science.io/assets/2018-11-18-data-science-with-python-cheatsheet/Data_Science_With_Python_Workflow.png?utm_source=chatgpt.com

(1) Phân tích doanh thu – chi phí – lợi nhuận

  • Tổng hợp dữ liệu bán hàng
  • Tính KPI
  • Theo dõi tăng trưởng

(2) Phân tích hành vi khách hàng

  • Tìm nhóm khách hàng
  • Phân tích churn rate
  • Tìm yếu tố ảnh hưởng mua hàng

(3) Xây mô hình dự báo

  • Dự báo doanh thu
  • Dự báo nhu cầu
  • Dự báo tồn kho

(4) Tự động hóa báo cáo

  • Lấy dữ liệu từ API
  • Làm sạch
  • Xuất báo cáo Excel/PDF
  • Gửi email tự động

(5) Kết nối với SQL — Data Warehouse

Python đọc dữ liệu từ:

  • MySQL
  • PostgreSQL
  • SQL Server
  • BigQuery
  • Snowflake

5. Demo: Phân tích doanh thu bằng Python

Dữ liệu mẫu: sales.csv

date,revenue,cost
2024-01-01,12000000,3000000
2024-01-02,15000000,4500000

Đọc dữ liệu

import pandas as pd

df = pd.read_csv("sales.csv")
df["date"] = pd.to_datetime(df["date"])
df["profit"] = df["revenue"] - df["cost"]

Xem tổng doanh thu & lợi nhuận

print(df["revenue"].sum())
print(df["profit"].sum())

Vẽ biểu đồ

import matplotlib.pyplot as plt

plt.plot(df["date"], df["profit"])
plt.title("Lợi nhuận theo ngày")
plt.xticks(rotation=45)
plt.show()

6. Tại sao người làm Data bắt buộc phải biết Python?

✔ Excel/Google Sheets không xử lý nổi dữ liệu lớn
✔ SQL chỉ là truy vấn – không làm trực quan hóa & mô hình được
✔ Python → chủ động phân tích, mô hình, tự động hóa
✔ Là kỹ năng bắt buộc trong Data Analyst, Data Engineer, AI Engineer

Do đó:

Python chính là kỹ năng sống còn của nghề Data.


7. Kết luận

Python là công cụ tối quan trọng để:

  • Phân tích dữ liệu
  • Tự động hóa công việc
  • Xây dựng Machine Learning
  • Xử lý dữ liệu lớn
  • Tạo báo cáo & dashboard

Từ doanh nghiệp nhỏ đến tập đoàn lớn, Python đều được dùng để ra quyết định dựa trên dữ liệu (data-driven decision).

| Xây Hệ Thống Giao Dịch Định Lượng Hoàn Chỉnh (Full Quant Trading System Architecture)

Được viết bởi thanhdt vào ngày 09/12/2025 lúc 18:53 | 277 lượt xem

Xây Hệ Thống Giao Dịch Định Lượng Hoàn Chỉnh (Full Quant Trading System Architecture)

https://d1rwhvwstyk9gu.cloudfront.net/2024/09/Automated-trading-system-protocols.png?utm_source=chatgpt.com
https://www.researchgate.net/publication/383917934/figure/fig1/AS%3A11431281277351811%401726025134974/Pipeline-of-Quant-Trading-Company.jpg?utm_source=chatgpt.com

Đây là bài cuối cùng và quan trọng nhất của series.
Bạn sẽ nắm được kiến trúc chuẩn của một quỹ định lượng, từ dữ liệu → tín hiệu → kiểm chứng → bot → quản lý rủi ro → giám sát.

Hệ thống giao dịch định lượng không phải chỉ là “code bot”.
Nó là một kiến trúc hoàn chỉnh, bao gồm:

  1. Data Layer – Thu thập & xử lý dữ liệu
  2. Signal Layer – Xây dựng chiến lược
  3. Backtest Layer – Kiểm chứng hiệu suất
  4. Execution Layer – Đặt lệnh
  5. Risk Engine – Quản lý rủi ro 24/7
  6. Orchestration Layer – Điều phối bot
  7. Monitoring Layer – Cảnh báo & giám sát
  8. Logging Layer – Lưu lịch sử & audit

1. Kiến trúc tổng quan của hệ thống Quant Trading

https://media2.dev.to/dynamic/image/width%3D1000%2Cheight%3D420%2Cfit%3Dcover%2Cgravity%3Dauto%2Cformat%3Dauto/https%3A%2F%2Fdev-to-uploads.s3.amazonaws.com%2Fuploads%2Farticles%2Fulsg4y6zkg8q74p8l33m.jpeg?utm_source=chatgpt.com
https://csdl-images.ieeecomputer.org/mags/co/2011/11/figures/mco20111100612.gif?utm_source=chatgpt.com
https://d1rwhvwstyk9gu.cloudfront.net/2024/09/Automated-trading-system-protocols.png?utm_source=chatgpt.com
                     [ DATA LAYER ]
   Dữ liệu giá • Orderbook • OI • Funding • On-chain • Macro
                               ↓
                     [ SIGNAL LAYER ]
      Trend • Mean Reversion • Breakout • Volume • Machine Learning
                               ↓
                    [ BACKTEST LAYER ]
         Equity Curve • Winrate • Sharpe • Max DD • Optimization
                               ↓
                [ EXECUTION LAYER (FastAPI) ]
       ccxt (Crypto) • MT5 (Forex) • Smart Execution • Queue
                               ↓
                    [ RISK ENGINE (24/7) ]
      TP/SL • Position Control • Max Loss • DD Control • Kill Switch
                               ↓
                   [ MONITORING LAYER ]
         Telegram • Dashboard • Zalo OA • Log Viewer • Alerts
                               ↓
                     [ LOGGING LAYER ]
            Orders • Signals • Errors • Metrics • DB History

Đây là kiến trúc mà:

  • Hedge Funds
  • Prop Firms
  • Market Makers
  • AI Trading Firms

đang sử dụng.


2. Data Layer – Nền tảng của mọi hệ thống

https://storage.googleapis.com/gweb-cloudblog-publish/images/1_Reference_architecture.max-2000x2000.jpg?utm_source=chatgpt.com
https://www.investopedia.com/thmb/TUKU6ePI7lQDYJlp4yQuklUriHk%3D/1500x0/filters%3Ano_upscale%28%29%3Amax_bytes%28150000%29%3Astrip_icc%28%29/quantitative-trading.asp-final-dce645f45bce45d88bd1f02e37bcb02f.png?utm_source=chatgpt.com

Dữ liệu cần có:

  • OHLCV
  • Tick data
  • Orderbook
  • Funding (Crypto)
  • OI (Open Interest)
  • Macro
  • On-chain (BTC, ETH, stablecoin)

Tool thu thập:

  • ccxt / ccxt.pro
  • Binance/Bitget API
  • MT5 API
  • vnstock3 (chứng khoán Việt Nam)
  • Dữ liệu premium: Kaiko, CryptoQuant, Glassnode

Data Processing:

  • Cleaning
  • Normalization
  • Resampling
  • Feature Engineering
  • Storage (PostgreSQL / MongoDB / TimescaleDB)

3. Signal Layer – Trái tim hệ thống

https://www.varchev.com/wp-content/uploads/2025/04/image-572.png?utm_source=chatgpt.com
https://www.mdpi.com/information/information-16-00584/article_deploy/html/images/information-16-00584-g003.png?utm_source=chatgpt.com
https://blueshift.quantinsti.com/docs/images/strategy.png?utm_source=chatgpt.com

Chiến lược phải chuẩn hóa thành code:

Nhóm chiến lược chính

  • Trend Following (EMA, Turtle, ADX)
  • Mean Reversion (RSI, Bollinger, Z-score)
  • Breakout (Volume + range)
  • Volume Profile strategies
  • Price Action / SMC
  • Machine Learning (RF / XGBoost / LSTM)

Đầu ra của Signal Layer:

Một tín hiệu chuẩn:

{
  "symbol": "BTC/USDT",
  "signal": "long",
  "confidence": 0.82,
  "tf": "15m",
  "entry": 68000,
  "stop_loss": 67500,
  "take_profit": 69500,
  "strategy": "trend_ml_combo",
  "timestamp": 1731234567
}

4. Backtest Layer – Kiểm chứng chiến lược

https://www.quantifiedstrategies.com/wp-content/uploads/2024/03/what-is-an-equity-curve.png?utm_source=chatgpt.com
https://www.itqualityindex.com/wp-content/uploads/2022/07/QuanQual-1.png?utm_source=chatgpt.com
https://m.media-amazon.com/images/I/71LKh0sNgRL._UF1000%2C1000_QL80_.jpg?utm_source=chatgpt.com

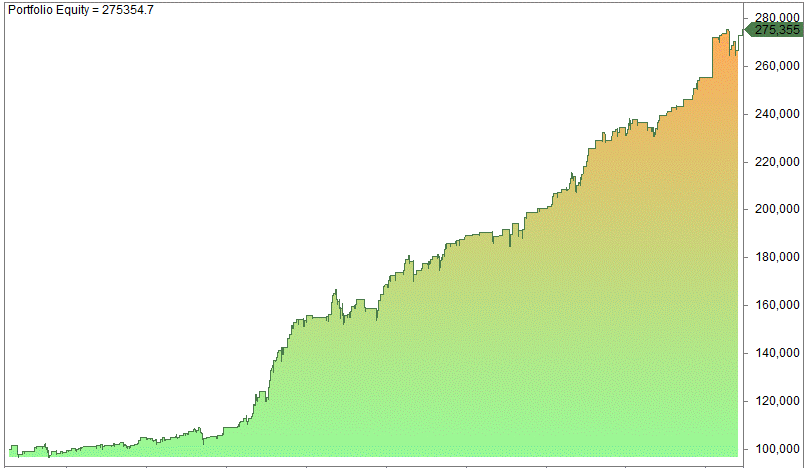
Backtest trả lời câu hỏi:

  • Chiến lược có kiếm tiền không?
  • Rủi ro có chấp nhận được không?
  • Có overfit không?

Các chỉ số cần xem:

  • Winrate
  • Profit Factor
  • Sharpe Ratio
  • Sortino
  • Max Drawdown
  • Recovery Factor
  • Volatility
  • Avg Trade
  • Equity Curve

Các bài kiểm tra:

  • Walk-forward test
  • Out-of-sample test
  • Parameter sweep
  • Monte Carlo simulation

Mục tiêu:

Chiến lược không thua lỗ dài hạn + Drawdown thấp + PF cao + ổn định.


5. Execution Layer – Não đặt lệnh

https://framerusercontent.com/images/FCtcwlHOW5jYoJsnJdbPfOxlAU0.png?height=875&width=1860&utm_source=chatgpt.com
https://www.lcx.com/wp-content/uploads/20200326-LCX-SmartOrder-Macbook-1.png?utm_source=chatgpt.com
https://miro.medium.com/v2/resize%3Afit%3A1400/0%2ABkG0TM_V8Q0Gpecu?utm_source=chatgpt.com

Bot thực chiến không đặt lệnh trực tiếp từ TradingView.
Tất cả phải qua Execution Layer.

Crypto Execution:

  • ccxt / ccxt.pro
  • Market order
  • Limit order
  • Reduce-only
  • Futures / Spot

Forex Execution:

  • MT5 API
  • Action_deal
  • Magic number
  • Partial close

Smart Execution:

  • Kiểm tra vị thế
  • Chống trùng lệnh
  • Khớp lệnh theo điều kiện
  • Chống slippage

6. Risk Engine – Lớp bảo vệ sống còn

https://wp.quadcode.com/wp-content/uploads/2024/05/pic-3-points-1024x631.png?utm_source=chatgpt.com
https://cptmarkets.com/static/images/trade/academy/articles/article6.1.jpg?utm_source=chatgpt.com
https://media.licdn.com/dms/image/v2/D5612AQEGKNVHPuwqAQ/article-cover_image-shrink_600_2000/article-cover_image-shrink_600_2000/0/1711907229268?e=2147483647&t=zyAhLHnFBwSvlmdlAhptCEQuuWkdMMB00jy_grgCpRw&v=beta&utm_source=chatgpt.com

Risk Engine chạy song song với bot, liên tục 24/7.

Các module chính:

  • Position sizing theo Risk %
  • ATR Stoploss
  • TP/SL Engine
  • Max Loss per trade
  • Max Daily Drawdown
  • Max Position Size
  • Anti-Overtrade
  • Anti-Reversal
  • Global Kill Switch

Ví dụ Kill Switch:

if daily_loss < -0.05 * balance:
    BOT_STATUS = "STOP"
    send_alert("Bot stopped due to max daily DD")

7. Orchestration Layer – Hệ thống điều phối

Nhiệm vụ:

  • Queue xử lý tín hiệu
  • Multi-strategy routing
  • AI model routing
  • Tối ưu concurrency
  • Load balancing khi scale bot

Công cụ:

  • Redis Queue
  • Celery
  • RabbitMQ
  • Kafka (đối với hệ thống lớn)

8. Monitoring Layer – Theo dõi bot realtime

https://cdn.dribbble.com/userupload/39671132/file/original-9c85e90ccd57ab5cda5cc5f1d772ccea.png?resize=752x&vertical=center&utm_source=chatgpt.com
https://clickalgo.com/images/uploaded/Products/Free%20Tools/telegram-signal-trader.png?utm_source=chatgpt.com
https://grafana.com/static/assets/img/blog/stonks_n_crypto_dashboard2.png?utm_source=chatgpt.com

Bot mạnh chỉ có nghĩa khi bạn có thể giám sát nó:

Cần theo dõi:

  • Số dư
  • Equity
  • Position
  • Lệnh mở
  • Lệnh đóng
  • Margin
  • Funding fee
  • Drawdown
  • API error

Công cụ:

  • Telegram Alert
  • Zalo OA
  • Grafana Dashboard
  • Cloudflare logs
  • Logtail / Datadog

9. Logging Layer – Trung tâm lưu trữ dữ liệu bot

Lưu:

  • Tín hiệu
  • Lệnh
  • Risk event
  • TP/SL
  • PnL
  • Lỗi API
  • Latency

DB phù hợp:

  • PostgreSQL
  • MongoDB
  • TimescaleDB
  • SQLite (dev only)

10. Full Pipeline – Từ Data đến Bot Auto Trading

https://www.researchgate.net/publication/362625915/figure/fig4/AS%3A11431281085524662%401663781246207/Design-scheme-of-the-quantitative-trading-system.jpg?utm_source=chatgpt.com
https://static.wixstatic.com/media/904900_03cec6a515434918ad8db97814d98a5c~mv2.png/v1/fill/w_1000%2Ch_510%2Cal_c%2Cq_90%2Cusm_0.66_1.00_0.01/904900_03cec6a515434918ad8db97814d98a5c~mv2.png?utm_source=chatgpt.com
https://miro.medium.com/v2/resize%3Afit%3A1400/0%2A1Tn69E0vvXkkD2AK?utm_source=chatgpt.com

Pipeline hoàn chỉnh:

[ DATA ] → [ FEATURE ] → [ SIGNAL ] → [ BACKTEST ]
                                       ↓
                                Good Strategy?
                                ↓        ↓
                               Yes       No
                                ↓         ↳ Optimize Again
                         [ EXECUTION ENGINE ]
                                ↓
                            [ RISK ]
                                ↓
                         [ TRADE EXECUTED ]
                                ↓
                      [ MONITORING + LOGGING ]

11. Yêu cầu triển khai Production

Để hệ thống hoạt động thật:

  • FastAPI + Uvicorn/Gunicorn
  • Docker + Docker Compose
  • Nginx Reverse Proxy
  • HTTPS (Let’s Encrypt)
  • Supervisor / PM2 / Systemd
  • Cloudflare bảo vệ
  • Worker xử lý queue
  • Telegram/ZNS monitoring
  • Auto restart bot

12. Ứng dụng thực tế

Hệ thống này áp dụng được cho:

✔ Crypto Futures (Binance, Bitget, Bybit)
✔ Forex (MT5)
✔ Stocks VN (vnstock + API)
✔ Webhook TradingView
✔ Tín hiệu từ mô hình AI
✔ Tự xây hệ thống prop trading nội bộ
✔ Auto portfolio rebalancing


13. Quan điểm quan trọng khi xây hệ thống Quant

Chiến lược không quan trọng bằng hệ thống.
Risk quan trọng hơn chiến lược.
Execution quan trọng hơn indicator.

Hệ thống mạnh = bot mạnh.


14. Kết luận

Bạn đã đi qua toàn bộ kiến thức nền tảng của giao dịch định lượng:

  • Thu thập dữ liệu
  • Tạo tín hiệu
  • Backtest
  • Tối ưu
  • Quản lý rủi ro
  • Xây bot FastAPI
  • Triển khai Production
  • ML nâng cấp chiến lược
  • Full Architecture

Và cuối cùng, hệ thống Quant Trading hoàn chỉnh chính là sự kết hợp:

Data → Strategy → Risk → Bot → Monitoring → Logging → Optimization

Đây là mô hình chuẩn mà mọi quỹ lớn đang sử dụng.

Kiến trúc quant đầy đủ cần thực hành end-to-end. Xem lộ trình xây dựng bot auto trading Python — khóa Vibe Code (24 buổi).

| Machine Learning Trong Giao Dịch Định Lượng

Được viết bởi thanhdt vào ngày 09/12/2025 lúc 18:51 | 218 lượt xem

Machine Learning Trong Giao Dịch Định Lượng: Dự Đoán Xu Hướng, Phân Loại Nến, Giảm Nhiễu Chiến Lược

https://media.licdn.com/dms/image/v2/D5612AQGq3JgGVJjRFA/article-cover_image-shrink_720_1280/article-cover_image-shrink_720_1280/0/1706093871874?e=2147483647&t=m4J2MkRa_XZ1tBoXpp3xJGrsvgrzA7h61A9FJD01OI0&v=beta&utm_source=chatgpt.com
https://d2908q01vomqb2.cloudfront.net/f1f836cb4ea6efb2a0b1b99f41ad8b103eff4b59/2020/12/22/ML-558-1.jpg?utm_source=chatgpt.com

Machine Learning (ML) đang trở thành một trong những công cụ tạo lợi thế lớn nhất trong giao dịch định lượng.
Khác với indicator truyền thống (EMA, RSI, MACD), ML có khả năng:

  • Nhận diện mô hình giá không nhìn thấy bằng mắt
  • Phân loại xu hướng chính xác hơn
  • Giảm nhiễu từ thị trường
  • Dự đoán breakout
  • Tạo tín hiệu “thông minh” hơn

Bài này giúp bạn xây dựng một pipeline ML hoàn chỉnh:

  1. Thu thập dữ liệu
  2. Feature Engineering
  3. Labeling (Tạo nhãn: tăng/giảm/sideway)
  4. Training Model (RF, XGBoost, LSTM)
  5. Backtest chiến lược ML
  6. Đánh giá mô hình
  7. Kết nối mô hình vào Bot Auto Trading

1. Tại sao Machine Learning phù hợp giao dịch định lượng?

https://wallstreetmojocms.recurpro.in/uploads/Machine_Learning_in_Trading_a0ea83da9c.jpg?utm_source=chatgpt.com
https://www.quantifiedstrategies.com/wp-content/uploads/2024/09/AI-Trading-Strategies-for-Beginners.png?utm_source=chatgpt.com
https://www.future-processing.com/blog/wp-content/uploads/2024/02/ML-in-finance-2.jpg?utm_source=chatgpt.com

ML mạnh ở 3 điểm:

  • Xử lý được dữ liệu lớn: hàng triệu nến trong vài giây
  • Không dựa vào cảm xúc: hoàn toàn khách quan
  • Phát hiện pattern mà indicator không bắt được

Ví dụ ML có thể phát hiện:

  • Xu hướng yếu → mạnh
  • Breakout giả → thật
  • Nến đảo chiều có xác suất cao
  • Mô hình giá phức tạp như Wyckoff/SMC

2. Pipeline Machine Learning trong trading

https://miro.medium.com/v2/resize%3Afit%3A1400/1%2AmxhjANt41NhFFbhvqIkUaw.png?utm_source=chatgpt.com
https://developer-blogs.nvidia.com/wp-content/uploads/2023/02/ml-workflow-udacity-625x337.png?utm_source=chatgpt.com
https://public.bnbstatic.com/image/cms/blog/20221129/34017821-0bdc-4300-b478-6856a1c0f863?utm_source=chatgpt.com

Pipeline chuẩn:

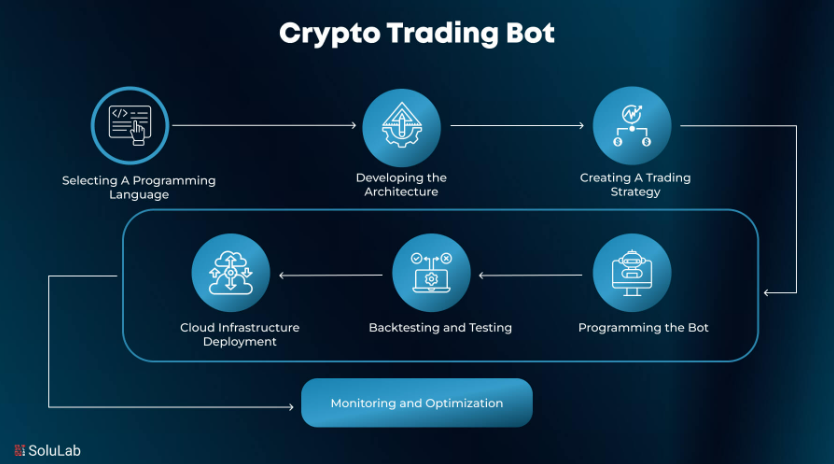
Dữ liệu → Feature Engineering → Label → Train ML Model → Backtest → Deploy → Bot

3. Thu thập dữ liệu cho ML

Dữ liệu cần:

  • OHLCV
  • Volume
  • ATR
  • Volatility
  • Orderbook (nếu cần)
  • Funding Rate (Crypto)
  • Open Interest

Ví dụ thu thập bằng ccxt:

bars = exchange.fetch_ohlcv('BTC/USDT', '5m', limit=5000)
df = pd.DataFrame(bars, columns=['time','open','high','low','close','volume'])
df['time'] = pd.to_datetime(df['time'], unit='ms')

4. Feature Engineering – Tạo đặc trưng mạnh cho ML

https://i.ytimg.com/vi/FUB1KlhqH58/hq720.jpg?rs=AOn4CLAlf2pe40iQwWh6QRLAw9zhIED_sg&sqp=-oaymwEhCK4FEIIDSFryq4qpAxMIARUAAAAAGAElAADIQj0AgKJD&utm_source=chatgpt.com
https://media.licdn.com/dms/image/v2/D4E22AQGOsjtnps1S4w/feedshare-shrink_1280/B4EZmmJ2MYHcAs-/0/1759429224188?e=2147483647&t=HCb6KOArsw-5MLnXkw8huKHzv-FjWo5xoiUfRcK9ZDk&v=beta&utm_source=chatgpt.com
https://www.researchgate.net/publication/383660285/figure/fig2/AS%3A11431281275086372%401725282702035/Dataset-and-Technical-Indicators.jpg?utm_source=chatgpt.com

Các nhóm feature quan trọng:

(1) Technical Indicators

  • EMA (20, 50, 200)
  • RSI
  • MACD
  • Bollinger Bands
  • ATR
  • ADX
  • CCI

(2) Statistical Features

  • Rolling mean
  • Rolling std
  • Z-score
  • Kurtosis
  • Skewness

(3) Price Action Features

  • Wick ratio
  • Candle body size
  • Volume spike
  • Trend angle
  • Orderblock / Support/Resistance zone

(4) Volatility Features

  • ATR
  • True Range
  • Historical volatility

(5) Orderbook Features (nâng cao)

  • Bid/Ask imbalance
  • Liquidity delta
  • Volume profile

Ví dụ Feature Engineering:

df['return'] = df['close'].pct_change()
df['ema20'] = df['close'].ewm(span=20).mean()
df['atr'] = ta.ATR(df['high'], df['low'], df['close'])
df['rsi'] = ta.RSI(df['close'])

5. Tạo nhãn (Labeling) – Tăng / Giảm / Sideway

3 cách gán nhãn phổ biến:

(1) Future Return Labeling

Dự đoán giá 1 nến sau sẽ tăng hay giảm.

df['future_return'] = df['close'].shift(-1) - df['close']
df['label'] = (df['future_return'] > 0).astype(int)

(2) Trend Classification

  • 1 = Uptrend
  • 0 = Sideway
  • -1 = Downtrend

(3) Triple Barrier Method (được các quỹ lớn dùng)

https://substackcdn.com/image/fetch/%24s_%218j09%21%2Cf_auto%2Cq_auto%3Agood%2Cfl_progressive%3Asteep/https%3A%2F%2Fsubstack-post-media.s3.amazonaws.com%2Fpublic%2Fimages%2Fd3f141f9-7d21-4f04-ac18-4debd1d207a3_1321x734.heic?utm_source=chatgpt.com
https://pubs.acs.org/cms/10.1021/acsmeasuresciau.4c00007/asset/images/large/tg4c00007_0012.jpeg?utm_source=chatgpt.com
https://user-images.githubusercontent.com/44833308/172560332-825bbd68-445d-4d35-a4b5-ac2d9fb74140.png?utm_source=chatgpt.com

Cài đặt ranh giới:

  • Upper barrier = TP
  • Lower barrier = SL
  • Vertical barrier = Time limit

Mô hình rất chính xác để phân loại:

  • Buy
  • Sell
  • Do nothing

6. Các mô hình ML mạnh dùng trong trading

https://i.ytimg.com/vi/t8sYlaCHu7I/maxresdefault.jpg?utm_source=chatgpt.com
https://d1rwhvwstyk9gu.cloudfront.net/2023/07/Decision-trees-and-limitation.png?utm_source=chatgpt.com
https://user-images.githubusercontent.com/45107198/65030726-4deca700-d940-11e9-8364-7dfdeb28f3d9.png?utm_source=chatgpt.com
Mô hìnhƯu điểmNhược điểm
Random ForestDễ dùng, mạnh, ít overfitKhông mô hình chuỗi
XGBoostDự đoán tốt, mạnh trong KaggleDễ overfit nếu dữ liệu bẩn
CatBoostRất tốt cho dữ liệu time seriesHuấn luyện lâu
LSTM / GRUHiểu chuỗi giá rất tốtCần GPU
TransformerSức mạnh AI hiện đạiRất nặng, khó deploy

7. Huấn luyện mô hình

Ví dụ Random Forest:

from sklearn.ensemble import RandomForestClassifier

model = RandomForestClassifier(
    n_estimators=300,
    max_depth=8,
    random_state=42
)

model.fit(X_train, y_train)
pred = model.predict(X_test)

8. Đánh giá mô hình

✔ Accuracy
✔ Precision
✔ Recall
✔ F1-score
✔ Confusion matrix

Nhưng quan trọng hơn là:

  • Profit Factor
  • Max Drawdown
  • Equity curve

ML model tốt nhưng không kiếm được tiền thì không dùng được.


9. Backtest chiến lược ML

https://www.ml4trading.io/static/home/img/parts/backtest.png?utm_source=chatgpt.com
https://www.quantifiedstrategies.com/wp-content/uploads/2024/03/what-is-an-equity-curve.png?utm_source=chatgpt.com
https://www.researchgate.net/publication/358872273/figure/fig6/AS%3A1128457136291874%401646056555141/Machine-learning-strategy-to-improve-the-evaluation-distribution.jpg?utm_source=chatgpt.com

Pipeline:

Predict → Generate Signal → Simulate Trades → Equity Curve → Metrics

Ví dụ tín hiệu ML:

df['signal'] = model.predict(X)
df['strategy_return'] = df['signal'].shift(1) * df['return']

10. Triển khai mô hình ML vào Bot Auto Trading

https://cdn.prod.website-files.com/660ef16a9e0687d9cc27474a/6625e0d9d9d453253f698e04_648a6e5ae681ee38e06d2bc7_fastapi_monitoring_tutorial.007-min.png?utm_source=chatgpt.com
https://tbis.io/wp-content/uploads/54179656629_d7b9a61537_o.jpg?utm_source=chatgpt.com
https://cloudxlab.com/blog/wp-content/uploads/2019/04/Machine-Learning-Model-Deployment.png?utm_source=chatgpt.com

FastAPI Endpoint:

@app.post("/ml-signal")
async def ml_signal(data: dict):
    features = extract_features(data)
    pred = model.predict([features])
    
    if pred == 1:
        signal = "long"
    else:
        signal = "short"

    await order_queue.put({
        "symbol": data["symbol"],
        "signal": signal,
        "confidence": data["confidence"],
        "strategy": "ml_model"
    })

    return {"signal": signal}

11. Kết hợp ML + Rule-based Strategy → Multi-Alpha System

Quỹ lớn hiện dùng mô hình:

  • 40% Trend
  • 30% Mean Reversion
  • 30% ML/AI

ML có thể dùng để:

  • Lọc tín hiệu nhiễu
  • Dự đoán breakout thật
  • Xác nhận xu hướng
  • Tối ưu vị thế

12. Sai lầm thường gặp khi dùng ML trong trading

https://fastercapital.com/i/Machine-learning--The-Rise-of-AI--Machine-Learning-in-Quantitative-Trading--Challenges-and-Pitfalls-in-Quantitative-Trading-with-AI.webp?utm_source=chatgpt.com
https://algotrading101.com/learn/wp-content/uploads/2019/07/overfitting-comics.jpg?utm_source=chatgpt.com
https://i.ytimg.com/vi/NsysK-bvvZk/hq720.jpg?rs=AOn4CLD5IWrIX89uAJshzwZNnwk6u-N2sA&sqp=-oaymwEhCK4FEIIDSFryq4qpAxMIARUAAAAAGAElAADIQj0AgKJD&utm_source=chatgpt.com
  1. Overfit mô hình → đẹp trong backtest, thua real
  2. Dùng quá nhiều feature
  3. Dữ liệu không làm sạch
  4. Không dùng labeling đúng cách
  5. Không kiểm tra overfitting
  6. Không kết hợp Risk Engine
  7. Không backtest pipeline ML đúng chuẩn

13. Kết luận

ML không phải “thuật toán thần thánh”, nhưng là vũ khí mạnh nhất trong bộ công cụ giao dịch định lượng.

Nhờ ML, bạn có thể:

  • Phát hiện mô hình ẩn
  • Dự đoán xu hướng
  • Giảm nhiễu
  • Tạo tín hiệu chất lượng hơn
  • Kết hợp với bot FastAPI để giao dịch tự động

Tương lai của bot trading = Rule-based Strategy + Machine Learning + Risk Engine.

| Kết Nối TradingView → FastAPI → Execution Engine Cho Bot Auto Trading

Được viết bởi thanhdt vào ngày 09/12/2025 lúc 18:49 | 243 lượt xem

Kết Nối TradingView → FastAPI → Execution Engine Cho Bot Auto Trading

Trong mô hình giao dịch định lượng hiện đại, một trong những quy trình quan trọng nhất là:

TradingView gửi tín hiệu → FastAPI nhận → Risk Engine xử lý → Execution Engine đặt lệnh

Đây là nền tảng của các hệ thống Auto Trading: Crypto, Forex và Chứng khoán.

Bài này hướng dẫn bạn:

  • Tạo webhook TradingView
  • Format payload chuẩn
  • Gửi tín hiệu vào FastAPI
  • Xử lý rủi ro
  • Đặt lệnh bằng ccxt và MT5
  • Tránh spam tín hiệu
  • Tạo pipeline xử lý theo hàng đợi (Queue)
  • Kiểm tra trạng thái bot realtime

1. Kiến trúc tổng quan của hệ thống Signal → Bot

https://user-images.githubusercontent.com/72407947/126675086-99f049dc-3e4c-41f1-92b7-7cca4612ab0a.png?utm_source=chatgpt.com
https://www.dspguide.com/graphics/F_28_5.gif?utm_source=chatgpt.com

Kiến trúc chuẩn:

TradingView Strategy
       ↓
Webhook (JSON POST)
       ↓
FastAPI Webhook Endpoint
       ↓
Risk Engine (DD, TP/SL, Position Control)
       ↓
Execution Engine (ccxt / MT5)
       ↓
Exchange
       ↓
Logging → Telegram Alerts → Database

2. Tạo chiến lược Pine Script gửi tín hiệu Webhook

Mẫu Pine Script Strategy

//@version=5
strategy("HNData Bot Auto Trading", overlay=true, process_orders_on_close=true)

// Ví dụ tín hiệu đơn giản
emaFast = ta.ema(close, 20)
emaSlow = ta.ema(close, 50)

longSignal  = ta.crossover(emaFast, emaSlow)
shortSignal = ta.crossunder(emaFast, emaSlow)

if (longSignal)
    strategy.entry("Buy", strategy.long)

if (shortSignal)
    strategy.entry("Sell", strategy.short)

Payload Webhook gửi về FastAPI

Trong TradingView:

  • Bấm Settings → Alerts
  • Chọn “Webhook URL
  • Paste URL:
https://yourdomain.com/webhook

JSON gửi về:

{
  "symbol": "{{ticker}}",
  "price": {{close}},
  "timeframe": "{{interval}}",
  "signal": "{{strategy.order.action}}",
  "strategy_id": "ema_cross_20_50",
  "confidence": 0.95
}

3. Tạo Webhook trong FastAPI

https://fastapi.tiangolo.com/img/tutorial/openapi-webhooks/image01.png?utm_source=chatgpt.com
https://www.svix.com/resources/assets/images/webhook-architecture-diagram-6b10973a8a8a3d828cfc529efdeba286.png?utm_source=chatgpt.com
https://blog.postman.com/wp-content/uploads/2024/03/05.png?utm_source=chatgpt.com

File main.py:

from fastapi import FastAPI, Request
import asyncio

app = FastAPI()
order_queue = asyncio.Queue()

@app.post("/webhook")
async def webhook(request: Request):
    data = await request.json()
    await order_queue.put(data)
    return {"status": "received", "data": data}

4. Tạo worker xử lý tín hiệu trong hàng đợi (Queue)

Queue giúp:

  • Chống spam lệnh
  • Chống tín hiệu gửi nhiều lần
  • Đảm bảo xử lý tuần tự
  • Tách Webhook và Execution Engine
async def worker():
    while True:
        signal = await order_queue.get()
        await process_signal(signal)
        order_queue.task_done()

Chạy worker trong background:

import threading

threading.Thread(target=asyncio.run, args=(worker(),), daemon=True).start()

5. Risk Engine – Chặn tín hiệu xấu trước khi đặt lệnh

https://d1rwhvwstyk9gu.cloudfront.net/2022/07/Architecture-for-Algorithmic-Trading-1.png?utm_source=chatgpt.com
https://assets.superblog.ai/site_cuid_clef5mzfn214481lk4138lvno3/images/tradetron-designs-13-1679327080937-compressed.png?utm_source=chatgpt.com
https://images.prismic.io/3commas/aEL09Lh8WN-LVwJk_what-is-position-trading-bot.png?auto=format%2Ccompress&utm_source=chatgpt.com

Risk Engine kiểm tra:

  • Đang có vị thế chưa → Không vào trùng
  • Hướng vị thế trái → Không đảo chiều sai
  • Drawdown > Mức cho phép → Stop bot
  • Volume quá lớn → Chặn
  • Stop Loss > Risk% → Chặn

Ví dụ kiểm tra vị thế Crypto:

async def risk_check(signal):
    positions = exchange.fetch_positions()
    for pos in positions:
        if pos["symbol"] == signal["symbol"] and pos["contracts"] > 0:
            if pos["side"] == signal["signal"]:
                return False
    return True

Nếu không pass:

if not await risk_check(signal):
    send_alert("⚠️ Risk block: Duplicate or invalid position")
    return

6. Execution Engine – Đặt lệnh Crypto bằng ccxt

https://i.sstatic.net/l04el.png?utm_source=chatgpt.com
https://miro.medium.com/v2/resize%3Afit%3A1400/1%2ADMNfCYAKZmlYBW1KFpFc-w.jpeg?utm_source=chatgpt.com
https://atas.net/wp-content/uploads//2020/05/Ris1-en.jpg?utm_source=chatgpt.com
import ccxt

exchange = ccxt.binance({
    "apiKey": API_KEY,
    "secret": API_SECRET
})

async def execute_order(signal):
    order = exchange.create_order(
        symbol=signal["symbol"],
        type="market",
        side=signal["signal"],
        amount=calc_amount(signal)
    )
    return order

7. Đặt lệnh Forex bằng MT5

import MetaTrader5 as mt5

def mt5_execute(symbol, volume, order_type):
    request = {
        "action": mt5.TRADE_ACTION_DEAL,
        "symbol": symbol,
        "type": order_type,
        "volume": volume,
    }
    return mt5.order_send(request)

8. Kết hợp FastAPI + ccxt + Risk Engine + Execution

Pipeline xử lý cuối:

async def process_signal(signal):

    # Bước 1. Kiểm tra Risk
    if not await risk_check(signal):
        return

    # Bước 2. Tính volume
    volume = calc_position(signal)

    # Bước 3. Đặt lệnh
    order = await execute_order(signal)

    # Bước 4. Lưu log
    save_order(order)

    # Bước 5. Gửi notify
    send_tele("Order executed: " + str(order))

9. Tránh spam tín hiệu (Anti-Duplicate Protection)

Sử dụng:

  • Hash tín hiệu
  • Cache tín hiệu gần nhất
  • Timestamp kiểm tra (ví dụ 10–15s)
import time

LAST_SIGNAL_TIME = 0

def anti_spam():
    global LAST_SIGNAL_TIME
    now = time.time()
    if now - LAST_SIGNAL_TIME < 5:  # 5 giây
        return False
    LAST_SIGNAL_TIME = now
    return True

10. Trạng thái bot (Bot Status API)

FastAPI cung cấp API để:

  • Kiểm tra bot ON/OFF
  • Kiểm tra số dư
  • Kiểm tra vị thế
  • Kiểm tra health
@app.get("/status")
def status():
    return {
        "bot": BOT_STATUS,
        "balance": exchange.fetch_balance()
    }

11. Logging & Alert

https://i.ytimg.com/vi/Sby3ZiRhHVQ/maxresdefault.jpg?utm_source=chatgpt.com
https://www.investopedia.com/thmb/hGjxeJS26v_yBP1F4_-c1u1Ftzs%3D/1500x0/filters%3Ano_upscale%28%29%3Amax_bytes%28150000%29%3Astrip_icc%28%29/GettyImages-699098011-793148ad63904565b2779ac7aaf93d53.jpg?utm_source=chatgpt.com
https://www.tradesmarter.com/blog/wp-content/uploads/2021/11/Screen-Shot-2021-11-04-at-18.14.54-1024x425.png?utm_source=chatgpt.com
  • Logging lệnh (DB + file)
  • Telegram Alert
  • Zalo Notifications
  • Dashboard UI (React / Flutter)

Ví dụ gửi Telegram:

def send_tele(msg):
    url = f"https://api.telegram.org/bot{TOKEN}/sendMessage"
    requests.post(url, json={"chat_id": CHAT_ID, "text": msg})

12. Kiểm thử Pipeline TradingView → FastAPI

Checklist:

✔ Gửi 1 tín hiệu thử từ TradingView
✔ Kiểm tra FastAPI nhận đúng JSON
✔ Risk Engine kiểm tra đúng
✔ Execution Engine đặt lệnh đúng
✔ Log lưu chính xác
✔ Bot tạo alert Telegram
✔ Không bị spam tín hiệu
✔ Không đặt lệnh trùng


13. Kết luận

Pipeline TradingView → FastAPI → Execution Engine là nền tảng của mọi hệ thống Auto Trading hiện đại.

Một bot mạnh phải thỏa:

  • Nhận tín hiệu nhanh
  • Không spam
  • Risk Engine kiểm tra chặt
  • Đặt lệnh chính xác
  • Lưu log đầy đủ
  • Giám sát realtime

Bot mạnh không nằm ở TradingView, mà nằm ở Backend FastAPI + Risk Engine + Execution Engine.

| Triển Khai Bot Auto Trading Lên Production (Docker + Uvicorn + Nginx + Supervisor)

Được viết bởi thanhdt vào ngày 09/12/2025 lúc 18:48 | 165 lượt xem

Triển Khai Bot Auto Trading Lên Production (Docker + Uvicorn + Nginx + Supervisor)

Bot Auto Trading không chỉ là code chiến lược hoặc backend FastAPI.
Điều quan trọng hơn là triển khai hệ thống chạy 24/7, đảm bảo:

  • Không bị đứng bot
  • Không bị lỗi API
  • Không bị kill process
  • Không mất tín hiệu TradingView
  • Không delay đặt lệnh
  • Không downtime khi thị trường biến động mạnh

Bài này hướng dẫn bạn triển khai bot đúng chuẩn Production:

✔ Docker
✔ Uvicorn / Gunicorn
✔ Nginx reverse proxy
✔ HTTPS (Let’s Encrypt)
✔ Supervisor / PM2 / Systemd
✔ Logging
✔ Auto restart
✔ Scaling


1. Kiến trúc triển khai chuẩn cho Bot Auto Trading

https://miro.medium.com/0%2AKqhM200Gdzm702vR?utm_source=chatgpt.com
https://miro.medium.com/v2/resize%3Afit%3A1200/1%2Apo-aQt5CvnTupGcJwql1Fw.png?utm_source=chatgpt.com
https://www.options-it.com/wp-content/uploads/2023/05/Screenshot-2023-05-12-at-10.37.17.png?utm_source=chatgpt.com

Kiến trúc đầy đủ:

Client / TradingView / AI Model
               ↓
        Nginx Reverse Proxy
               ↓
   Uvicorn/Gunicorn + FastAPI App
               ↓
Execution Engine • Risk Engine • Account Sync
               ↓
DB (PostgreSQL / MongoDB / Redis)
               ↓
Monitoring (Telegram/Zalo/Grafana)

2. Chuẩn bị File Project

Cấu trúc thư mục:

/bot
    ├── main.py
    ├── requirements.txt
    ├── Dockerfile
    ├── docker-compose.yml
    ├── supervisord.conf
    └── app/
         ├── engine/
         ├── risk/
         ├── execution/
         └── config/

3. Viết Dockerfile cho FastAPI Bot

Tạo file Dockerfile:

FROM python:3.11-slim

WORKDIR /app

COPY requirements.txt .

RUN pip install -r requirements.txt

COPY . .

CMD ["uvicorn", "main:app", "--host", "0.0.0.0", "--port", "8000"]

4. Viết docker-compose.yml

version: "3.9"

services:
  bot:
    build: .
    container_name: trading_bot
    ports:
      - "8000:8000"
    restart: always
    environment:
      - API_KEY=xxx
      - API_SECRET=yyy

  nginx:
    image: nginx:latest
    container_name: bot_nginx
    ports:
      - "80:80"
    volumes:
      - ./nginx.conf:/etc/nginx/nginx.conf
    depends_on:
      - bot

5. File nginx.conf – Reverse Proxy

https://www.digitalocean.com/api/static-content/v1/images?src=https%3A%2F%2Fjournaldev.nyc3.cdn.digitaloceanspaces.com%2F2019%2F03%2Fnginx-reverse-proxy.png&width=1920&utm_source=chatgpt.com
https://miro.medium.com/1%2AYhBB03K_qw2GPSEt41Y5nQ.jpeg?utm_source=chatgpt.com
events {}

http {
    server {
        listen 80;
        server_name yourdomain.com;

        location / {
            proxy_pass http://bot:8000;
            proxy_set_header Host $host;
            proxy_set_header X-Real-IP $remote_addr;
        }
    }
}

6. Chạy bot bằng docker-compose

docker-compose up -d

Kiểm tra container:

docker ps

Truy cập:

http://yourdomain.com/docs

7. Cài SSL (HTTPS) bằng Certbot

Nếu chạy trên máy thật, thêm lệnh:

sudo apt install certbot python3-certbot-nginx
sudo certbot --nginx -d yourdomain.com

8. Dùng Uvicorn + Gunicorn để tăng hiệu năng

Tạo file gunicorn_conf.py:

workers = 4
worker_class = "uvicorn.workers.UvicornWorker"
timeout = 120

Dockerfile mới:

CMD ["gunicorn", "main:app", "-k", "uvicorn.workers.UvicornWorker", "-c", "gunicorn_conf.py"]

9. Sử dụng Supervisor để Auto Restart Bot

https://blog.jcharistech.com/wp-content/uploads/2023/03/Supervisorctl_Overview_JCharisTech.png?utm_source=chatgpt.com
https://www.tecmint.com/wp-content/uploads/2017/03/ProcessState.png?utm_source=chatgpt.com

Tạo file supervisord.conf:

[program:trading_bot]
command=python3 main.py
directory=/app
autostart=true
autorestart=true
stderr_logfile=/var/log/bot.err.log
stdout_logfile=/var/log/bot.out.log

Chạy:

supervisord -c supervisord.conf

10. Logging – Bắt toàn bộ hoạt động của bot

Lưu vào file:

import logging

logging.basicConfig(
    filename='bot.log',
    level=logging.INFO,
    format='%(asctime)s %(levelname)s: %(message)s'
)

Lưu vào Database:

  • Lệnh vào/ra
  • TP/SL
  • Lỗi API
  • Risk events

11. Monitoring – Theo dõi bot realtime

https://cdn.dribbble.com/userupload/43559128/file/original-99f0dc8255377c81245bd42d42089968.jpg?resize=2048x1536&vertical=center&utm_source=chatgpt.com
https://grafana.com/media/blog/forex/exchange-rate-dashboard.png?utm_source=chatgpt.com
https://i.ytimg.com/vi/tkMhCdN8Wzo/maxresdefault.jpg?utm_source=chatgpt.com

Giải pháp giám sát:

  • Telegram Alerts
  • Zalo OA ZNS
  • Grafana + Prometheus
  • Logtail / Datadog
  • Health-check API

Ví dụ gửi Telegram khi lỗi API:

async def send_alert(msg):
    await httpx.AsyncClient().post(
        TELEGRAM_URL,
        json={"text": msg}
    )

12. Chống Spam Lệnh & Độ Trễ (Latency)

Để tránh bot mở trùng lệnh:

  • Dùng Redis Queue
  • Lock theo symbol
  • Timestamp tín hiệu
  • Kiểm tra vị thế trước khi đặt

Bot production bắt buộc:

  • Latency < 100ms
  • Xử lý >100 tín hiệu / giây

13. Bảo mật (Security)

✔ Ẩn API Key trong biến môi trường
✔ Giới hạn IP được gọi webhook
✔ Token xác thực Webhook
✔ Bảo vệ bằng Cloudflare
✔ Không commit API Key lên GitHub


14. Kiểm thử trước khi triển khai thực chiến

Stress Test  
Backtest  
Paper Trade  
Forward Test  
Sandbox  
Real Trading (small size)  
Scale Up

15. Kết luận

Một bot auto trading mạnh không chỉ cần:

  • Chiến lược tốt
  • Risk Engine tốt
  • Execution chuẩn

→ Mà còn phải triển khai đúng chuẩn Production, chạy 24/7, không downtime.

Docker + Uvicorn + Nginx + Supervisor là combo mạnh nhất để đảm bảo bot chạy:

  • Ổn định
  • An toàn
  • Tối ưu hiệu năng
  • Dễ bảo trì
  • Dễ mở rộng

| Quản Lý Rủi Ro Trong Giao Dịch Định Lượng (TP/SL, Max Loss, Drawdown, Risk Engine)

Được viết bởi thanhdt vào ngày 09/12/2025 lúc 18:46 | 223 lượt xem

Quản Lý Rủi Ro Trong Giao Dịch Định Lượng (TP/SL, Max Loss, Drawdown, Risk Engine)

Image 12

Trong giao dịch định lượng và bot auto trading, chiến lược chỉ quyết định 30–40% hiệu quả, phần còn lại đến từ:

  • Risk Management
  • Execution
  • Tâm lý được loại bỏ (bot)

Risk Management chính là hệ miễn dịch của hệ thống. Nếu không có Risk Engine, mọi bot sẽ thua lỗ, kể cả chiến lược mạnh.

Bài này giúp bạn hiểu đầy đủ:

  • Vì sao quản lý rủi ro quan trọng
  • Các thành phần của Risk Engine
  • Cách xây TP/SL thông minh
  • Max Loss / Max Daily Loss
  • Drawdown (DD)
  • Position sizing
  • Cách Risk Engine tích hợp vào FastAPI bot

1. Risk Management là gì?

Risk Management là hệ thống kiểm soát mức thua lỗ, bảo vệ vốn và ngăn bot vào lệnh nguy hiểm.

Không có risk = mất tài khoản.
Risk tốt = tồn tại lâu dài + lợi nhuận đều.


2. 5 thành phần của một Risk Engine hiện đại

https://sterlingtradingtech.com/assets/images/risk-margin/risk-diagram.png?utm_source=chatgpt.com
https://d1rwhvwstyk9gu.cloudfront.net/2022/07/Architecture-for-Algorithmic-Trading-1.png?utm_source=chatgpt.com
https://quantmutual.com/images/risko-vh-vh.jpg?utm_source=chatgpt.com

Một Risk Engine chuẩn gồm:

  1. Position Sizing – Tính khối lượng vào lệnh
  2. Stop Loss / Take Profit Engine
  3. Max Loss per Trade
  4. Max Daily Drawdown
  5. Position Control – Kiểm tra trùng lệnh, đảo chiều lệnh
  6. Execution Safety – Chống lỗi API
  7. Global Kill Switch – Dừng bot khi rủi ro lớn

3. Position Sizing – Tính khối lượng vào lệnh theo Risk %

Ví dụ:
Bạn muốn rủi ro 1% tài khoản cho mỗi lệnh.

Công thức (Crypto/Fx):

Risk Amount = Balance * Risk%
Position Size = Risk Amount / (Entry - Stop Loss)

Code Python:

def calc_position(balance, entry, sl, risk=0.01):
    risk_amount = balance * risk
    size = risk_amount / abs(entry - sl)
    return size

4. TP/SL Engine – Cốt lõi của kiểm soát rủi ro

https://stocksharp.com/file/111684/stop-loss-order-trade.jpg?utm_source=chatgpt.com
https://wp.quadcode.com/wp-content/uploads/2024/08/What_is_ST_TP_1-1024x784.jpg?utm_source=chatgpt.com
https://s3.tradingview.com/c/cvDTAbMn_mid.webp?utm_source=chatgpt.com

Stop Loss (SL)

Mục tiêu: hạn chế thua lỗ đến mức có thể chấp nhận.

Các loại SL:

  • Fixed SL (theo giá cố định)
  • ATR SL (theo biến động)
  • Structure SL (dựa vào SMC: swing high/low)
  • Dynamic SL (di chuyển theo thị trường – trailing stop)

Take Profit (TP)

  • RR cố định: 1:1, 1:2
  • Theo ATR
  • Theo vùng cản
  • Theo tín hiệu đảo chiều

TP/SL tự động bằng FastAPI + ccxt

async def set_tp_sl(symbol, amount, tp, sl):
    await exchange.create_order(symbol, "takeProfit", "sell", amount, tp)
    await exchange.create_order(symbol, "stopLoss", "sell", amount, sl)

Nếu API không hỗ trợ → dùng Poller để tự kiểm tra:

async def check_tp_sl():
    positions = exchange.fetch_positions()

    for pos in positions:
        if pos['unrealizedPnl'] >= TARGET_PROFIT:
            exchange.close_position(pos['symbol'])
        if pos['unrealizedPnl'] <= -MAX_LOSS:
            exchange.close_position(pos['symbol'])

5. Max Loss per Trade – Giới hạn thua cho mỗi lệnh

Ví dụ:

  • Max Loss = 1% vốn
  • Nếu SL > 1% thì không vào lệnh

Code:

if (abs(entry - sl) / entry) > 0.01:
    return "Risk too high → Block"

6. Max Daily Loss – Cứu cánh cho mọi trader

https://cdn.corporatefinanceinstitute.com/assets/maximum-drawdown.png?utm_source=chatgpt.com
https://tradethatswing.com/wp-content/uploads/2021/08/setting-daily-loss-limits-while-day-trading.jpg?utm_source=chatgpt.com

Quy tắc vàng:

“Mất 3%–5% trong 1 ngày → dừng giao dịch.”

Backend FastAPI cần:

  • Theo dõi PnL theo ngày
  • Dừng bot nếu vượt ngưỡng
  • Gửi alert qua Telegram / Zalo OA
if daily_loss <= -MAX_DAILY_DD:
    disable_bot()
    send_alert("Bot stopped due to max daily drawdown")

7. Max Drawdown (DD) – Rủi ro nguy hiểm nhất

Drawdown (DD) = mức giảm vốn từ đỉnh → đáy.

Mức DDĐánh giá
< 10%Rất an toàn
10–25%Chấp nhận được
> 40%Rủi ro cao
> 60%Sập chiến lược

Trao đổi thật:
95% chiến lược bot bị loại vì DD quá lớn.

https://d2a032ejo53cab.cloudfront.net/Glossary/DcZkgSmc/dd.png?utm_source=chatgpt.com
https://therobusttrader.com/wp-content/uploads/img_5d3ccbc950e64.png?utm_source=chatgpt.com
https://www.daytrading.com/wp-content/uploads/2020/09/Screen-Shot-2020-09-20-at-5.26.25-PM.png?utm_source=chatgpt.com

8. Position Control – Chống mở lệnh trùng / đảo chiều sai

Backend phải kiểm tra:

  • Đang LONG mà lại LONG tiếp?
  • OneWay Mode → không thể Hedge
  • Chiến lược spam tín hiệu → bot mở 10 lệnh liên tục
  • Chiến lược gửi tín hiệu nhưng vị thế còn mở

Code kiểm tra:

async def can_open(symbol, side):
    positions = exchange.fetch_positions()
    for pos in positions:
        if pos["symbol"] == symbol and pos["contracts"] > 0:
            if pos["side"] == side:
                return False
    return True

9. Global Kill Switch – Công tắc dừng khẩn cấp

Trong hệ thống chuyên nghiệp:

  • Bin hết vốn
  • API lỗi
  • Thị trường biến động cao (FOMC, CPI…)
  • Bot vào lệnh sai liên tục

→ Backend phải tự động STOP ALL.

if risk_too_high:
    GLOBAL_BOT_ENABLE = False

10. 6 lỗi Risk Management khiến bot cháy tài khoản

https://blog.shoonya.com/wp-content/uploads/2023/06/Common-Trading-Mistakes-Every-Investor-Should-Avoid.jpg?utm_source=chatgpt.com
https://fastercapital.com/i/Algorithmic-Trading--Unleashing-the-Power-of-Systematic-Management--Risk-Management-in-Algorithmic-Trading.webp?utm_source=chatgpt.com
https://xaubot.com/wp-content/uploads/2025/10/Mistakes-in-Algorithmic-Trading.png?utm_source=chatgpt.com
  1. Không dùng Stop Loss
  2. Spam lệnh vì tín hiệu bị lặp
  3. Không kiểm tra drawdown
  4. Không có Max Daily Loss
  5. Không dùng Position Sizing
  6. Không có Global Kill Switch

11. Risk Engine trong thực tế – Tích hợp trong Backend FastAPI

Luồng xử lý:

Signal → Risk Engine → Nếu Pass → Execution  
                   ↓
                Nếu Fail → Reject + Alert

Hệ thống gồm:

  • risk/check_position.py
  • risk/check_drawdown.py
  • risk/position_sizing.py
  • risk/tp_sl_engine.py
  • risk/global_kill_switch.py

12. Kết luận

Trong giao dịch định lượng:

  • Chiến lược giúp bạn kiếm tiền
  • Risk giúp bạn giữ tiền
  • Execution giúp bạn không bị mất tiền vì sai lệnh

Risk Engine mạnh = bot sống lâu.
Risk Engine yếu = chiến lược mạnh mấy cũng cháy.

Risk Management là nền tảng quan trọng nhất trong giao dịch định lượng và bot auto trading.

| Xây Dựng Bot Auto Trading Bằng FastAPI + ccxt (Crypto) + MT5 (Forex)

Được viết bởi thanhdt vào ngày 09/12/2025 lúc 18:43 | 232 lượt xem

Xây Dựng Bot Auto Trading Bằng FastAPI + ccxt (Crypto) + MT5 (Forex)

Bot Auto Trading là một hệ thống tự động hóa toàn bộ quá trình giao dịch:
nhận tín hiệu → kiểm tra rủi ro → tính khối lượng → đặt lệnh → quản lý TP/SL → giám sát tài khoản.

Trong bài này, bạn sẽ học cách xây dựng Bot Auto Trading thực chiến bằng:

  • FastAPI → Backend điều khiển bot
  • ccxt / ccxt.pro → Kết nối Crypto exchanges (Binance, Bitget, Bybit…)
  • MetaTrader 5 (MT5) → Gửi lệnh Forex
  • Database (PostgreSQL/MongoDB)
  • Risk Engine → TP/SL, drawdown, kiểm tra vị thế
  • Webhook → Nhận tín hiệu từ TradingView hoặc AI Model

1. Kiến trúc tổng quan của Bot Auto Trading

https://www.biz4group.com/blog/images/how-to-create-an-ai-trading-bot/step-by-step-guide-how-to-create-an-ai-trading-bot.webp?utm_source=chatgpt.com
https://www.researchgate.net/publication/272911326/figure/fig1/AS%3A294858037186560%401447311042061/Flow-chart-of-an-automatic-trading-system.png?utm_source=chatgpt.com
https://miro.medium.com/v2/resize%3Afit%3A1358/format%3Awebp/0%2A1Tn69E0vvXkkD2AK?utm_source=chatgpt.com

4

Một hệ thống bot chuẩn gồm:

[ TradingView / AI Model / Strategy Engine ]
                       ↓
                [ FastAPI Webhook ]
                       ↓
                 [ Risk Engine ]
                       ↓
                [ Execution Engine ]
              /                        \
    [ Crypto Exchange via ccxt ]   [ MT5 Forex ]
                       ↓
                [ Monitoring + DB ]

2. Tạo FastAPI Backend – Trung tâm điều khiển bot

Khởi tạo project FastAPI

pip install fastapi uvicorn python-dotenv ccxt MetaTrader5

Tạo file main.py:

from fastapi import FastAPI

app = FastAPI()

@app.get("/")
def root():
    return {"status": "bot_running"}

Chạy server:

uvicorn main:app --reload

3. Kết nối Crypto Exchange bằng ccxt

https://user-images.githubusercontent.com/1294454/29979754-6d62354c-8f4f-11e7-9e0a-22e87b4a093b.jpg?utm_source=chatgpt.com
https://opengraph.githubassets.com/b45168cf348b77349704417e83a759d8571a6efff40e5d760086a8ca65c4090c/ccxt/go-binance?utm_source=chatgpt.com
https://cdn.prod.website-files.com/61f96beec33fb75e1254e857/63c5b94e5f3ff17f6e7773ab_crypto-api-trading-software.png?utm_source=chatgpt.com

Cấu hình kết nối

import ccxt
import os

exchange = ccxt.binance({
    "apiKey": os.getenv("API_KEY"),
    "secret": os.getenv("API_SECRET")
})

Hàm đặt lệnh Crypto

async def place_order(symbol, side, amount):
    order = exchange.create_order(
        symbol=symbol,
        type="market",
        side=side,
        amount=amount
    )
    return order

4. Kết nối Forex bằng MetaTrader 5 (MT5)

https://lh7-us.googleusercontent.com/docsz/AD_4nXcRpDBHbV8kEKyHN_Df5Mxx2mbjwGAfNigAE_-c6m4QrS7PQS_K4FFHFxco7Kikws3sdLLAGh2a6TpMHZkvW6ANyi_HpbJ1qj2YDE0LfV6Z6vHNi82IRyhqmROqR-GYKSlNTCfLTLquQW2ga3XcgAfmU8g?key=hXXX4eQYvESeVCRGC2p5Ew&utm_source=chatgpt.com
https://repository-images.githubusercontent.com/277256890/3de4bb80-cb3f-11ea-8264-f2cfcb86b641?utm_source=chatgpt.com
https://a.c-dn.net/c/content/dam/publicsites/igcom/uk/images/ContentImage/pages/MDE-5215-trading-apis.png/jcr%3Acontent/renditions/original-size.webp?utm_source=chatgpt.com
import MetaTrader5 as mt5

mt5.initialize()

def mt5_order(symbol, volume, order_type):
    request = {
        "action": mt5.TRADE_ACTION_DEAL,
        "symbol": symbol,
        "volume": volume,
        "type": order_type,  # BUY / SELL
    }
    return mt5.order_send(request)

5. Nhận tín hiệu qua Webhook (TradingView → FastAPI)

https://s3.tradingview.com/t/tDipDZBj_mid.png?v=1578567681&utm_source=chatgpt.com
https://user-images.githubusercontent.com/33667144/176252098-b38ed127-2c3e-41c4-9f4f-d3187da37368.jpg?utm_source=chatgpt.com
https://www.researchgate.net/publication/376378273/figure/fig3/AS%3A11431281210749045%401702169337992/Signal-Processing-pipeline-The-signal-processing-pipeline-is-divided-into-four-steps.jpg?utm_source=chatgpt.com

TradingView gửi về dạng JSON:

{
  "symbol": "BTCUSDT",
  "side": "long",
  "tf": "15m",
  "confidence": 0.92
}

FastAPI webhook:

from fastapi import Request

@app.post("/webhook")
async def webhook(request: Request):
    data = await request.json()
    symbol = data["symbol"]
    side = data["side"]

    # Đưa vào hàng đợi xử lý
    await order_queue.put(data)
    return {"received": data}

6. Risk Engine – Bước quan trọng nhất của bot

https://www.fourchain.com/images/blog-og-images/crypto-trading-bot-risk-management-strategies.jpg?utm_source=chatgpt.com
https://ucpath.berkeley.edu/sites/default/files/styles/openberkeley_image_full/public/general/position_lifecycle.png?itok=_ITuLbVO&timestamp=1742409133&utm_source=chatgpt.com
https://xtsupport.zendesk.com/hc/article_attachments/48323163553433?utm_source=chatgpt.com

Risk Engine xử lý:

  • Giới hạn số lệnh
  • Check drawdown
  • Chống mở lệnh trùng
  • Kiểm tra hướng vị thế
  • Kiểm soát volume
  • Set TP/SL

Ví dụ kiểm tra vị thế Crypto

async def can_open(symbol, side):
    positions = exchange.fetch_positions()
    for pos in positions:
        if pos["symbol"] == symbol and pos["contracts"] > 0:
            if pos["side"] == side:
                return False
    return True

7. Execution Engine – Đặt lệnh nhanh và an toàn

Execution phải xử lý:

  • Market order
  • Limit order
  • TP/SL
  • Retry nếu API lỗi
  • Logging

Luồng xử lý đặt lệnh

Signal → Risk Engine → Execution → Confirm → DB → Notify

Worker xử lý hàng đợi

order_queue = asyncio.Queue()

async def worker():
    while True:
        signal = await order_queue.get()
        await process_signal(signal)
        order_queue.task_done()

8. Đồng bộ tài khoản – kiểm tra liên tục

Bot cần kiểm tra:

  • Equity
  • Balance
  • Margin
  • Funding Fee
  • Tỷ lệ đòn bẩy
  • Position size

Ví dụ kiểm tra balance:

balance = exchange.fetch_balance()
print(balance["USDT"]["free"])

9. Lưu lịch sử giao dịch & logging

Database nên dùng:

  • PostgreSQL (ổn định, mạnh)
  • MongoDB (linh hoạt)

Lưu:

  • Lệnh
  • TP/SL
  • Risk event
  • Signal nhận
  • Log lỗi
  • Số dư tài khoản

10. Monitoring – Theo dõi bot real-time

https://cdn.dribbble.com/userupload/39671132/file/original-9c85e90ccd57ab5cda5cc5f1d772ccea.png?resize=752x&vertical=center&utm_source=chatgpt.com
https://www.quantservice.com/wp-content/uploads/2022/02/qP_Finland-1024x535.jpg?utm_source=chatgpt.com
https://i.sstatic.net/0lSAk.png?utm_source=chatgpt.com

Kênh giám sát:

  • Telegram Bot
  • Zalo OA ZNS
  • Email
  • Dashboard React/Flutter
  • Grafana + Prometheus

Ví dụ gửi Telegram:

import httpx

async def send_tele(msg):
    url = f"https://api.telegram.org/bot{TOKEN}/sendMessage"
    async with httpx.AsyncClient() as client:
        await client.post(url, json={"chat_id": CHAT_ID, "text": msg})

11. Tích hợp Crypto & Forex trong một bot

Hệ thống có thể chạy đồng thời:

  • Crypto (BTC/ETH/BNB)
  • Forex (EURUSD, XAUUSD)

Sử dụng cấu trúc:

/engine/crypto_ccxt.py
/engine/forex_mt5.py
/engine/risk.py
/engine/execution.py
/main.py

12. Quy trình xây bot chuẩn (Roadmap)

Dữ liệu → Chiến lược → Backtest → Tối ưu → Bot FastAPI → Risk → Execution → Monitoring

Không bao giờ xây bot khi chưa có:

✔ Backtest ổn
✔ Profit Factor > 1.5
✔ Max DD < 25%
✔ Recovery Factor cao
✔ Risk Engine chặt


13. Kết luận

Bot Auto Trading không phải chỉ là code đặt lệnh.
Nó là một hệ thống hoàn chỉnh gồm:

  • FastAPI backend
  • ccxt / MT5
  • Risk Engine
  • Execution Engine
  • Monitoring
  • Queue xử lý
  • Database
  • Webhook tín hiệu

Và quan trọng nhất:

Một chiến lược tốt chỉ hiệu quả khi backend mạnh và Risk Engine vững chắc.